
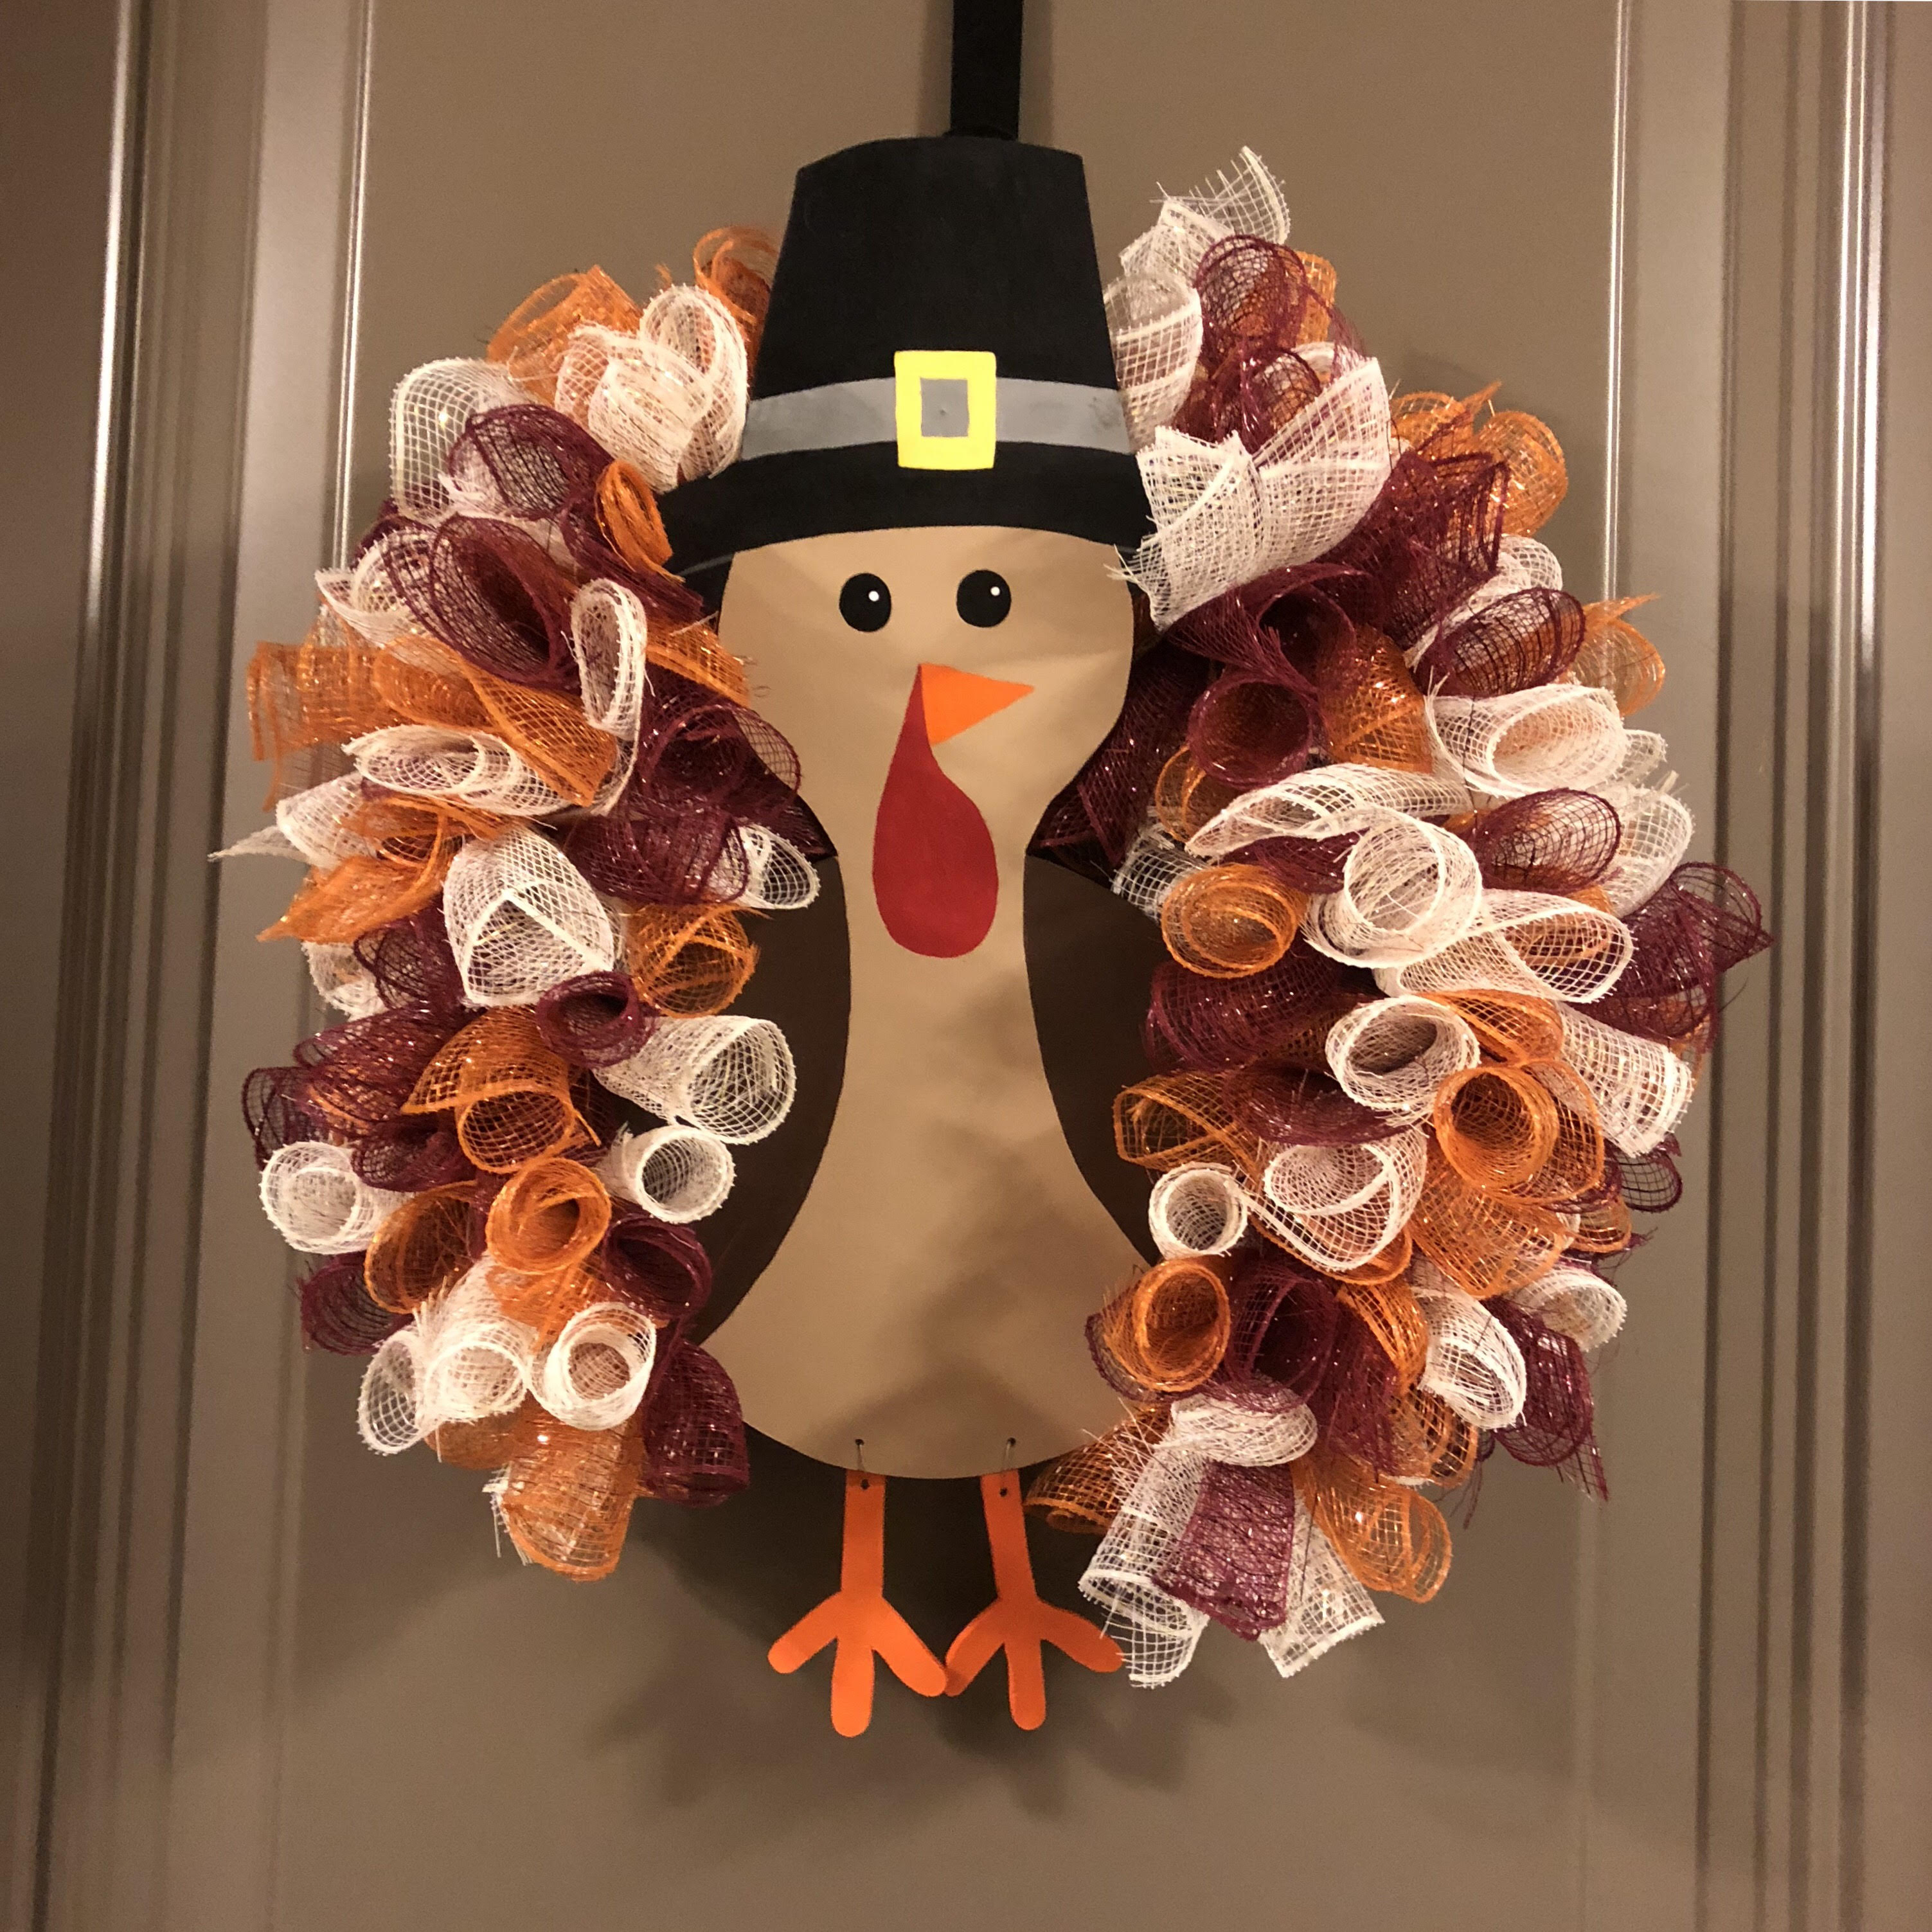
Tommy turkey came to our house in a fun new way this year. With a newly bare door after Halloween ended, I was itching for a Thanksgiving wreath. Yes, even though I am OBSESSED with Christmas, I also enjoy Thanksgiving and the beautiful decorations that can go along with it (I did have Christmas music playing while we made the wreaths though haha). This fun little wreath was made by both my mom and I. We used a new technique than before for the turkey’s feathers. I’m excited to share the step by step for how to make this little DIY wreath.
Update November 2022: We are happy to announce that our Etsy page now has the wooden cutout turkey for sale! You can order it painted or unpainted. Please note it is the wood cutout only – It will NOT include the completed wreath at this time. Click here to check it out!
Supplies:
- ¼ inch plywood
- Pencil
- Scroll saw
- Paint: Pumpkin, Light Brown, Dark Brown, Black, Red, Grey, Yellow, and White
- Mesh Ribbon: Orange, Purple, Cream
- 12 in. Wreath Form
- Wire
Directions:
Begin by drawing the turkey onto the plywood. What I did was found two circular objects in the house (inside of the 12 inch wreath form and a roll of tape that was slightly smaller) and traced them a few inches apart on the board. Then I connected them to form the neck of the turkey. Draw the feet separate if you would like them to dangle like shown in ours. Cut out using the scroll saw.
Paint the turkey using the various colors listed above. You can get creative with this, who says his hat needs to be black with gray and yellow trim!
To create the feathers, begin by cutting a piece of the mesh ribbon about 7 inches long. This will be your pattern for cutting. Begin to cut a large amount of purple, orange, and cream. When you are satisfied with your starting amount of the ribbon, do a similar length of thin wire and make a pile of the wire pieces.
My rationale was to take 2 of one color, and 1 of the remaining two colors. Roll the color that you will have two pieces of tightly and pinch in the middle. I got about 3 rolls out of mine. Then take one of the secondary colors and do the same roll and this time you will pinch it in a diagnol to the first piece to create an X with the two rolls. Use the third color and put it vertical between the first two pieces. Use the second piece of the two piece color, roll and pinch in alignment with the second color (the one that created the X). Take a piece of wire and tightly wrap where you have pinched the pieces together.
Repeat this many times, alternating which color has two until you have at least 20 groupings of mesh ribbon.
To attach to the wreath form, begin by using the wire that pinched the pieces together and push on the outside of the middle two rings of the form, twist and tighten gently. Take the next one and tighten on the outside of the wreath form and the second wire in then to the inside wreath from rings. Alternate this until you have at least 5-6 pieces between one section of the wreath form.
At this point, I would recommend attaching the turkey and working around him. To attach, drill two small holes on the brim of the hat and where the feet will go at the bottom. We used the bottom holes for the feet to also attach to the bottom of the wreath form. Use the brim holes, to attach to the top of the wreath form.
Repeat the steps with the mesh ribbon bunches around the wreath form until it is as full as desired.

I would definitely order the Halloween wreath!
LikeLike
Pingback: 20 DIY Thanksgiving Turkey Wreaths - Sweet Money Bee
Pingback: 31 Best Thanksgiving Crafts for Adults
Pingback: 31 DIY Thanksgiving Wreaths